Using a Gaoersi 6x12
Magazine with various frame sizes on one Film
I have been brought up using my father’s Plaubel(s), with their unique sheet film magazines, filled with
Agfapan and an occasional Ektachrome. It has taken me decades to realize that there is something like
an ”international” back standard, much more common and practical and for which there are new
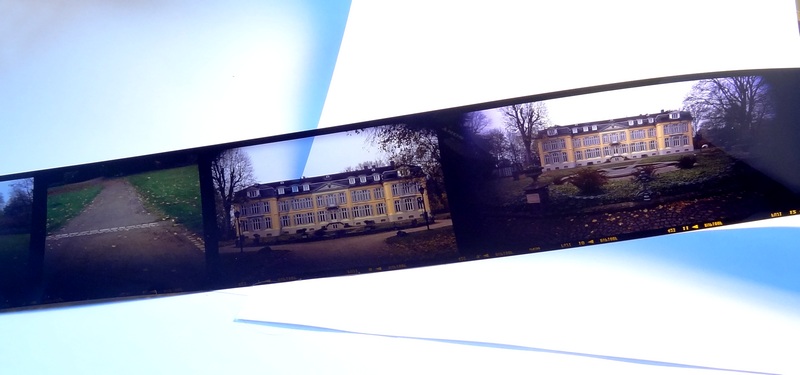
developments even now, from China, like this Gaoersi 6x12 magazine – said to be capable of taking
6x6, 6x9 and 6x12 sized images on one film, in any order.
Only Google Translate has enabled me to understand the Chinese description of the magazine, which made me aware of some errors in my previous article, that I am now able to correct.
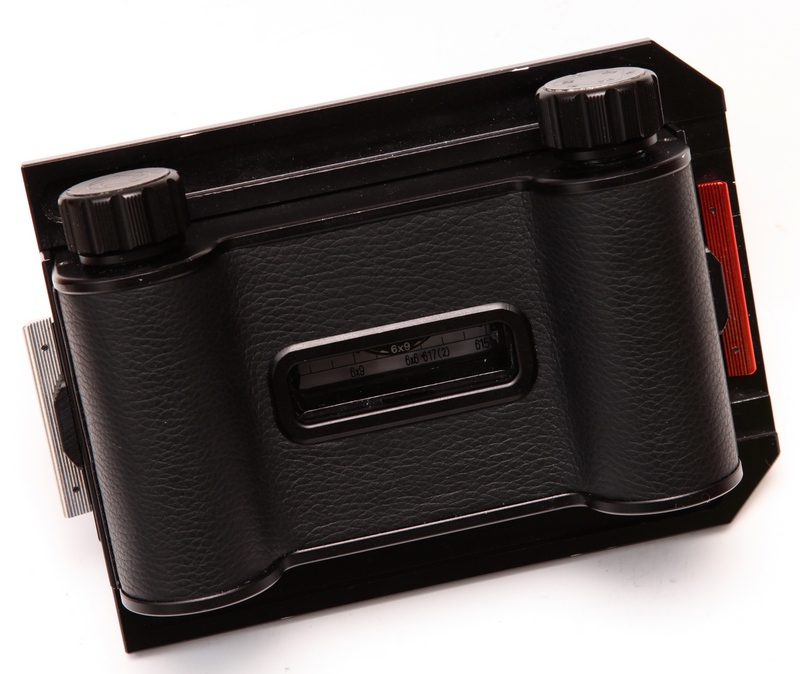
Film
should be loaded into the right chamber, i.e. the film will be
transported through the magazine from right to left (as seen from the
back). It is also possible to load the film into the other chamber, but
this instruction will then no longer apply.
The film window shows various engravings. Some I have designated with numbers, to which I will refer in the following
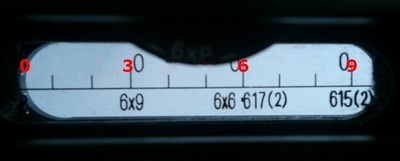
To begin with, film should be loaded and transported until frame number
1 is in portion 6. If needed, the position can be adjusted back and
forth using the other knob.
If the first frame is to be a 6x6, all there is to be done is to pull out the right magazine slide until the engraved 6x6 line is just visible.
If a 6x9 is desired, the film
needs to be transported a little bit further, until frame 1 is in
position 3. Left and right magazine slide are adjusted to 6x9
For a 6x12 as the first frame,
frame 1 needs to be transported to position 0 and the magazine slides
need to entirely free the film window.
Should this be the setup for the whole film, the process is pretty simple:
6x6
The film needs to be transported such that the next
following frame number is always on position 6
6x9
If the current frame number is on position 3 (like
for the first frame), the film needs to be transported until the
current frame number plus 2 is on position 9
If the current frame number is on 9, the film needs to be transported until the next frame number is on 3
6x12
For all subsequent frames, the film needs to be
transported so that the next frame number plus 2 is on position 0
Mixing formats
If frame sizes need to be mixed, the memory disc in the film window needs to be used, because the frame size of the current image needs to be known for the correct amount of advance.
Ideally, the memory disc is adjusted before the current frame is exposed, to 6x6, 6x9 or 6x12 depending on the current format. If this is not done, you are in the dark regarding the next transport (see foot note #1).
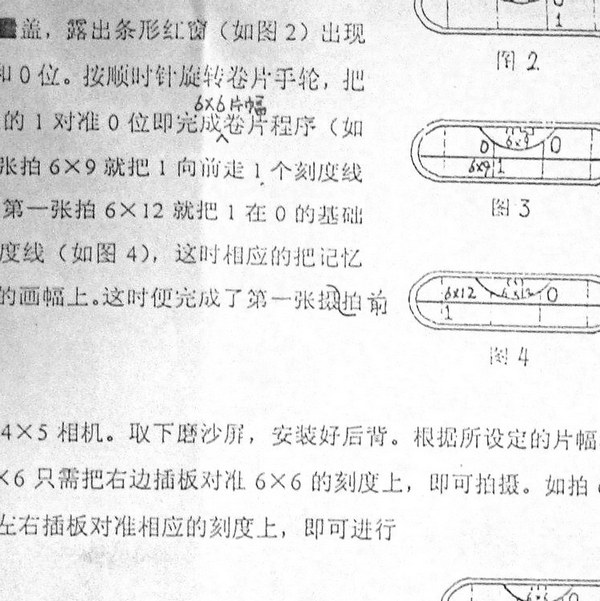
The
possible combinations are listed in the following table, to be read
from left to right (third line): If the current frame is a 6x6 and the
next is to be a 6x9 and the current frame number is on 3, the film
needs to be advanced until the next frame number is on 0.
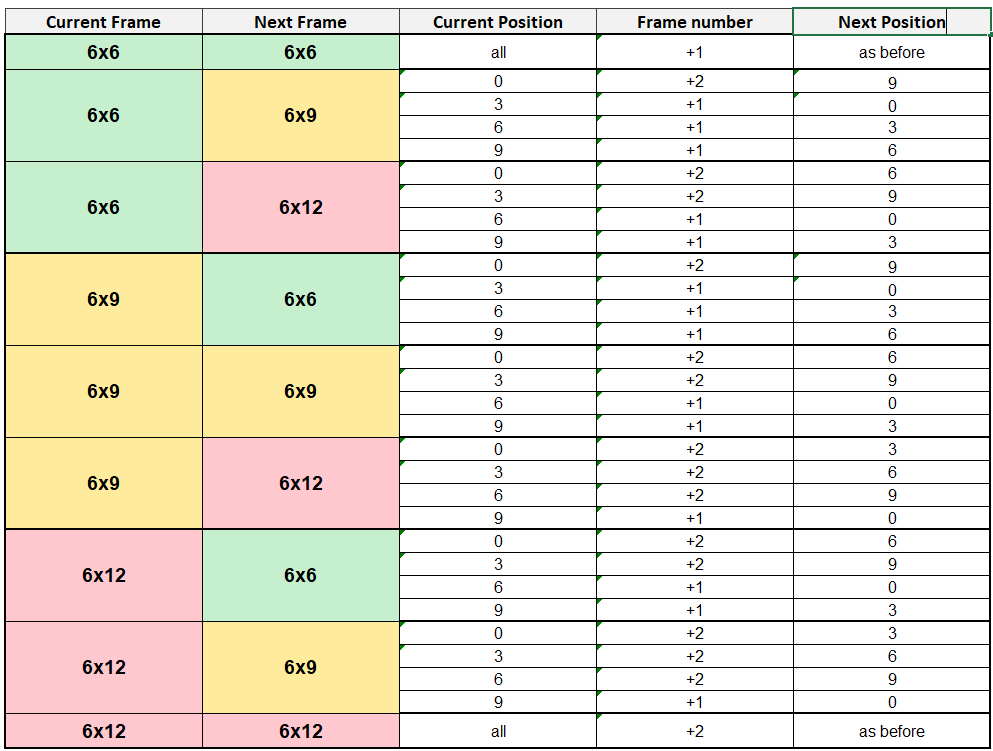
Using the table should be practical for occasional use. However, with some practice and some understanding of the logic, the markings and the engravings on the memory disk allow the use of the magazine without the table.
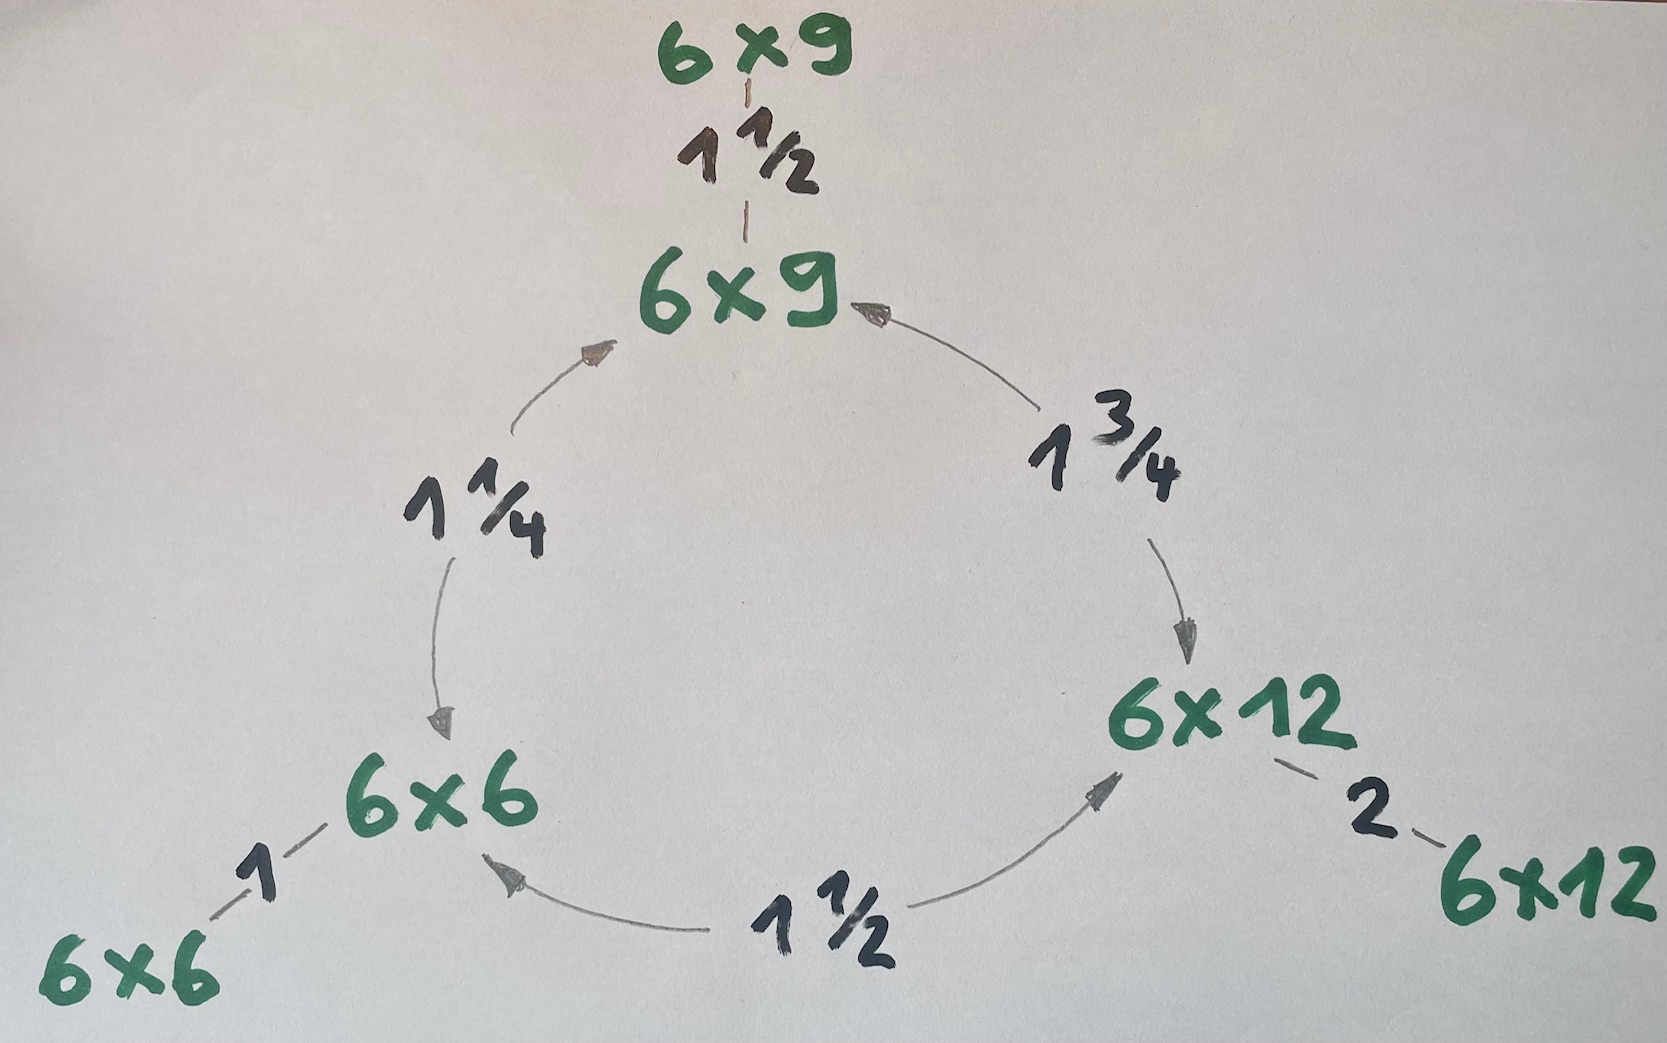
The distances between the markings 0 - 3, 3 – 6 and 6 – 9 each correspond to ¼ of the 6x6 frame width. Between 0 until the next frame number appears at position 9, it is also ¼ of a 6x6 frame.
As the window shows the middle of the film backing paper (where the frame numbers for 6x6 are printed) the distance between two 6x6 frames obviously ist he frame width, so the next frame number needs to be in the same position.
The distance between two 6x9 frames is 1,5 of the 6x6 frame width (2 for two 6x12 frames).
The
necessary distances between 6x6, 6x9 and 6x12 are engraved on the
memory disc, so correct transport can be achieved with these without
using the table – you just have to do it right…
Two remarks:
1.) Should one have overlooked to set the memory disc, the film should be transported as per below, to avoid possible overlap of images:
- transport 1 1/2 times for a 6x6 as the next frame
- transport 1 3/4 times for a 6x9 as the next frame
- transport 2 times for a 6x12 as the next frame
2.) To avoid waste of film at the end of a roll and also to not 'overshoot', some care needs to be taken.
The last 6x12 image can be taken when frame number 11 on position 0.
The last 6x9 image can be taken when frame number 12 is on position 9.
The last 6x6 image can be taken when frame number 12 is on position 6.